This week our customer Liquifusion Studios needed a way to provide restricted end-user access for limited file management via sftp. Liquifusion, run by Doug Harrison, provides premium quality custom web development. I recommend them highly.
Doug needed to grant sftp access to a limited number of users on Ubuntu Server. There was no need to set up a full-featured FTP server like vsftpd to address this simple need. Instead, we elected to use rssh.
Here’s how we used rssh to provide sftp-only access on ubuntu1.
Install rssh
From the rssh homepage: “rssh is a restricted shell for use with OpenSSH, allowing only scp and/or sftp”. This guide demonstrates how to use rssh to restrict end users to sftp access only.
The ubuntu package manager makes installing rssh simple. Make sure your sources are up-to-date, then install rssh:
$ sudo apt-get update
$ sudo apt-get install rssh
Configure rssh
By default, all protocols available to rssh are disabled. To permit desired protocols, uncomment them in the rssh config file.
$ sudo nano -w /etc/rssh.confWe wanted to permit only sftp access to end users on this server, but you could choose to enable other protocols, including scp, rdist, rsync, and cvs. If you enable other protocols, make sure you understand your configuration and take appropriate security measures.
Also note that the default umask for rssh is 022. That means files will be created with read and write permissions for the user, and read-only permissions for the group and others, but without execute permissions.
Optional security measures
Note that mounting user filesystems with noexec and nosuid is recommended on multi-user systems. Also, for the truly paranoid (or those with even tighter security requirements), rssh supports chroot.
The details of those additional security measures are outside the scope of this guide. You can find more information in the CHROOT document included with the rssh source.
Add restricted users
Now that rssh is configured, we’re ready to add restricted users. The adduser command on ubuntu can add the user account, create and set ownership of the user’s home directory, and set the user’s shell to rssh.
Let’s create an account for the fictional “Joe User” (juser) for this example.
Decide where to locate the user folder
The adduser command will create the user’s home directory if it does not already exist. If the directory already exists, the specified folder will be set as the user’s home directory.
If for some reason you want to create the directory manually, use the mkdir command:
$ sudo mkdir /var/www/juserAdd the user
Note that when you specify an existing directory as the user’s home, you may get a warning like “The home directory ‘/var/www/juser/’ does not belong to the user you are currently creating”. This is expected. We’ll fix that shortly.
Now, add the user:
$ sudo adduser --home /var/www/juser/ --shell /usr/bin/rssh juserYou should enter the full name and a strong password for the user. Other details are left to your discretion2.
Set owner on home folder
Now, if you specified an existing directory as the user’s home, let’s address that warning. Change ownership of the user’s home folder to the user:
$ sudo chown --recursive juser /var/www/juserThat’s done—now it’s time to test file management over sftp!
Test sftp connection
For this part, you’ll need an sftp client. If you don’t have a favorite already, I recommend the open-source, cross-platform FileZilla. Download and install the client, then open its Site Manager and add a new site.
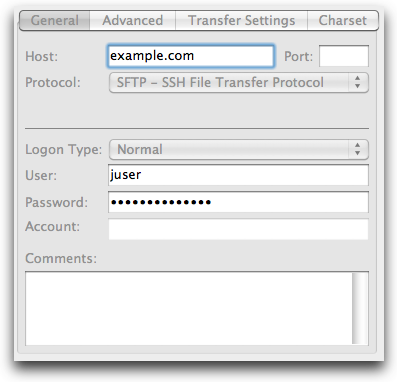
Configure your sftp client to connect to the host where you’ve just added a user account (by hostname or IP address), using protocol SFTP (SSH File Transfer Protocol). This typically uses port 22, but with FileZilla you should only need to specify the protocol.

FileZilla Site Manager
Choose a login type of Normal, enter the username and password you specified when creating the user, and hit Connect.
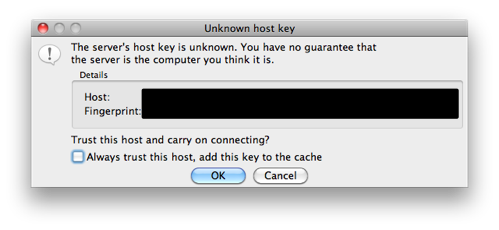
You may be prompted to accept the host key for this server, if you have not previously connected using FileZilla. If you’re just using this to test, you can skip the “Always trust…”; or, if you’ll be using this frequently, go ahead and check the box before clicking OK.

FileZilla: Unknown host key
That should do it. Enjoy!
-
Ubuntu Server 10.04 LTS (lucid) is the current long-term support release at the time of this writing. While these instructions might work with other versions of ubuntu, or other linux distributions, we only tested with Ubuntu Server 10.04 LTS. ↩
-
Sometimes you might have other users (or processes that run as other users) that need access to the directory we set as the user’s home. We have a group called “sftponly” for just this purpose.
You could do what we did here: change the primary group for the new user to match that used by the other users in the group. To change the user’s primary group to match, issue the following command:
$ sudo usermod -g sftponly juserOf course, if you know you’re going to set up multiple users to use “sftponly” as their primary group, you could specify the default group when you create the user. Here’s the syntax for adding a user with the default group option:
$ sudo adduser --home /var/www/juser/ --shell /usr/bin/rssh --ingroup sftponly juserIn the instance of shared folders, you might also want to change the umask in
/etc/rssh.confto002, which leaves write permission enabled for the user’s group. ↩
{ Comments on this entry are closed }
